Yes, you can add or give more memory to a proxmox vm . Your machine should have physical memory tho, so that there wont be a performance issue.
In this comprehensive guide will walk you through how to give a VM in Proxmox more memory, whether it’s powered on or off. We’ll cover the step-by-step procedure, explain critical concepts like “Ballooning” and “Hot-Plug,” and provide essential best practices to ensure a smooth upgrade.
Why Would You Need to Increase VM Memory?
Before we dive in, let’s quickly cover why you might need to do this:
- Application Demands: Installing new memory-intensive software (e.g., databases, web servers).
- Increased Workload: The VM is handling more users or processes than initially planned.
- Performance Bottlenecks: You’re seeing high memory usage metrics, swapping, or slow response times.
- Testing & Development: You need to test an application under different resource constraints.
Method 1: The Standard Way (VM Shutdown)
This is the safest and most recommended method, especially for significant memory increases or if you’re unsure about your VM’s OS compatibility with hot-plugging.
Step 1: Access the Proxmox Web Interface
Log in to your Proxmox VE web interface.
Step 2: Shut Down the Target VM
In the left-hand resource tree, select your VM. Click on “Shutdown” in the upper menu. It’s best to do a graceful shutdown rather than a hard stop. Wait for the VM’s status to show as “stopped”.
Step 3: Open the Hardware Configuration
- With the VM selected and stopped, click on “Hardware” in the left-hand menu of the VM’s console.
- Find and click on the “Memory” entry in the list.
- Click the “Edit” button at the top of the window.
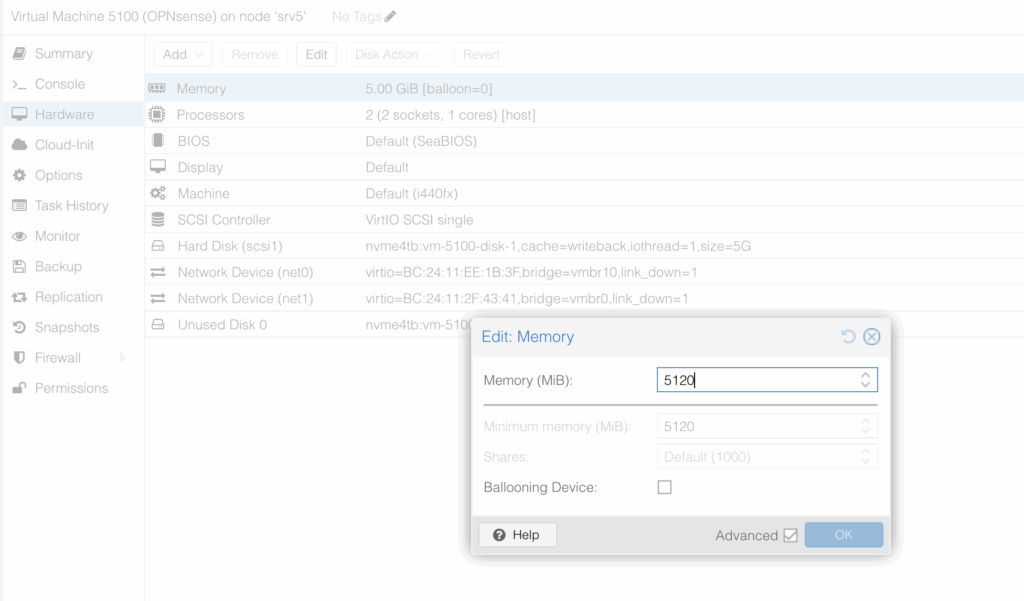
Step 4: Adjust the Memory Value
- In the “Memory (MiB)” field, enter the new desired amount of RAM in Mebibytes (MiB).
- Example: For 8 GB of RAM, you would enter
8192(8 x 1024).
- Example: For 8 GB of RAM, you would enter
- (Optional) You can also adjust the “Minimum Memory” value, which is used with the Ballooning Driver.
- Click “OK” to save the changes.
Step 5: Start the VM and Verify
- Click “Start” to power on the VM.
- Once the VM boots up, log in to its operating system and verify that the new memory amount is recognized.
- Windows: Open Task Manager (Ctrl+Shift+Esc) and go to the Performance tab.
- Linux: Use the command
free -horcat /proc/meminfo.